Test Mod
This guide explains how to validate, install, and test a mod built with the current TypeScript-based toolkit workflow.
1. Validate TypeScript before export
Install the Puer-Project dependencies first, then run the per-mod lint step from that same folder:
cd /Puer-Project
npm install
After that, run:
cd /Puer-Project
npm run lint:mod -- com.yourname.yourmod
Use this to catch missing exports, type errors, and common script issues before you package the mod.
2. Build and install the mod
Option A: Mod Exporter
Use the Mod Exporter window in Unity for the normal workflow.
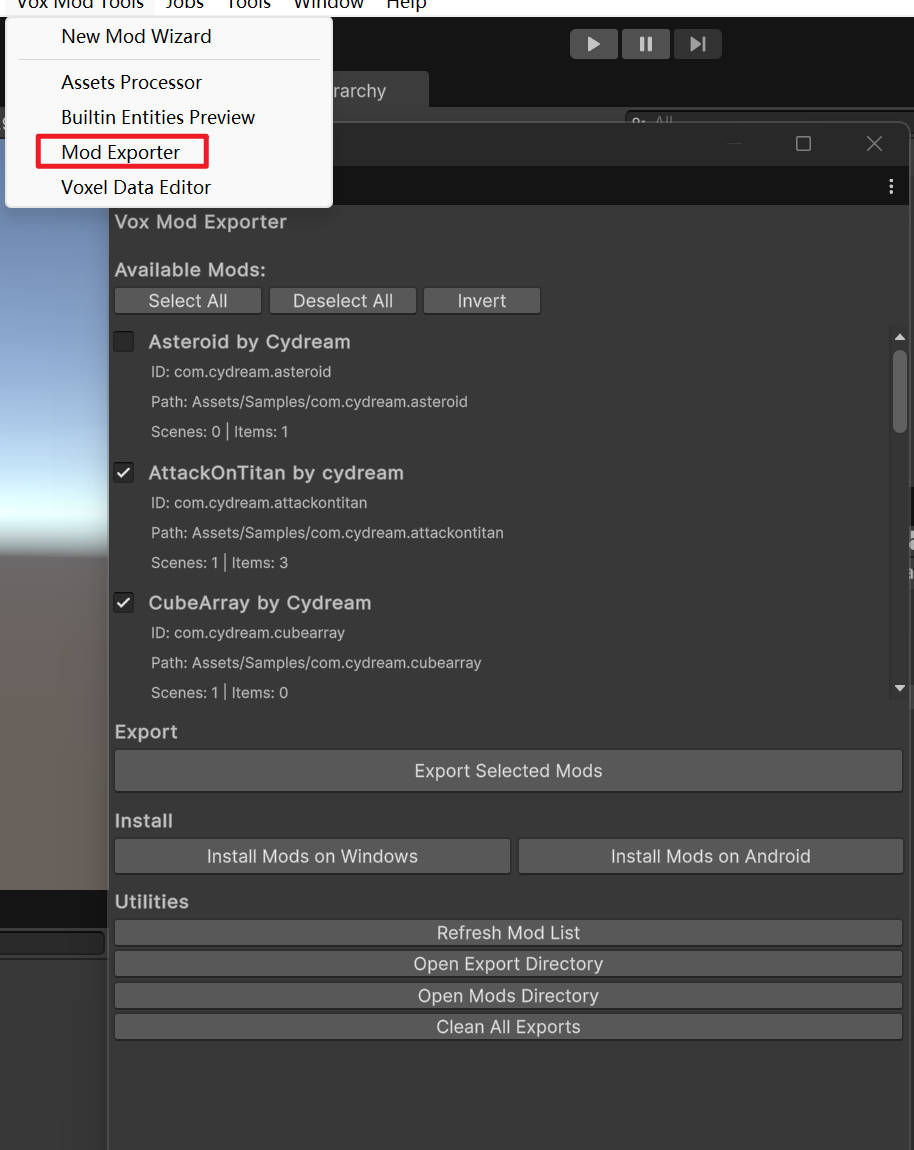
- Open Vox Mod Tools > Mod Exporter.
- Select your mod.
- Build for the target platform.
- Install the built mod to your local game instance.
Option B: Manual installation
If you need to move the build to another machine:
- Build the mod in the exporter.
- Locate the exported output for your platform.
- Copy the full mod folder into the game's
Modsdirectory.
Windows mods are loaded from:
%userprofile%\AppData\LocalLow\Cydream\Voxel Playground\Mods\
The game loads valid mod folders from that directory on startup.
3. Verify the prefab-script wiring
For TypeScript gameplay logic, most runtime failures come from prefab setup rather than compilation. Check these first:
- The prefab has a
JsComponentProxycomponent. - The proxy script name matches the exported TypeScript class name exactly.
Scripts/index.tsexports the class used by the prefab.- Any required object references are assigned through
JsProperties. - The prefab is included in
manifest.asset.
4. Read logs
Use logs to confirm the script was instantiated and to diagnose missing bindings.
VR mode
- Start the game.
- Open Settings > Dev > Console.
- Read the log output from the in-game console.
Note: the in-game console is available in development builds.
Flatscreen mode
If you are testing without VR, use the player log:
%userprofile%\AppData\LocalLow\Cydream\Voxel Playground\Player.log
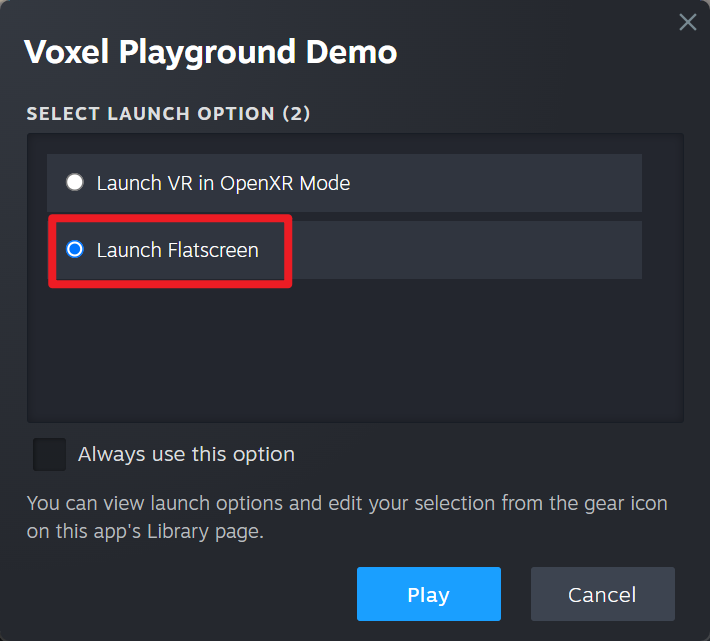
5. Use flatscreen mode for fast iteration
Common controls:
- Move:
W,A,S,D - Look: Mouse
- Jump:
Space - Hands / fire: Mouse buttons and number keys depending on the held item
For script-heavy mods, flatscreen mode is usually the fastest way to verify prefab setup and gameplay loops before switching to VR testing.